Search for answers or browse our knowledge base.
If you already have your child(ren)'s Schoology Access ID that were emailed to you at the beginning of the school year, please skip to step 5.
If you already have a parent Schoology account and need to add another child to your existing account, please skip to step 10.
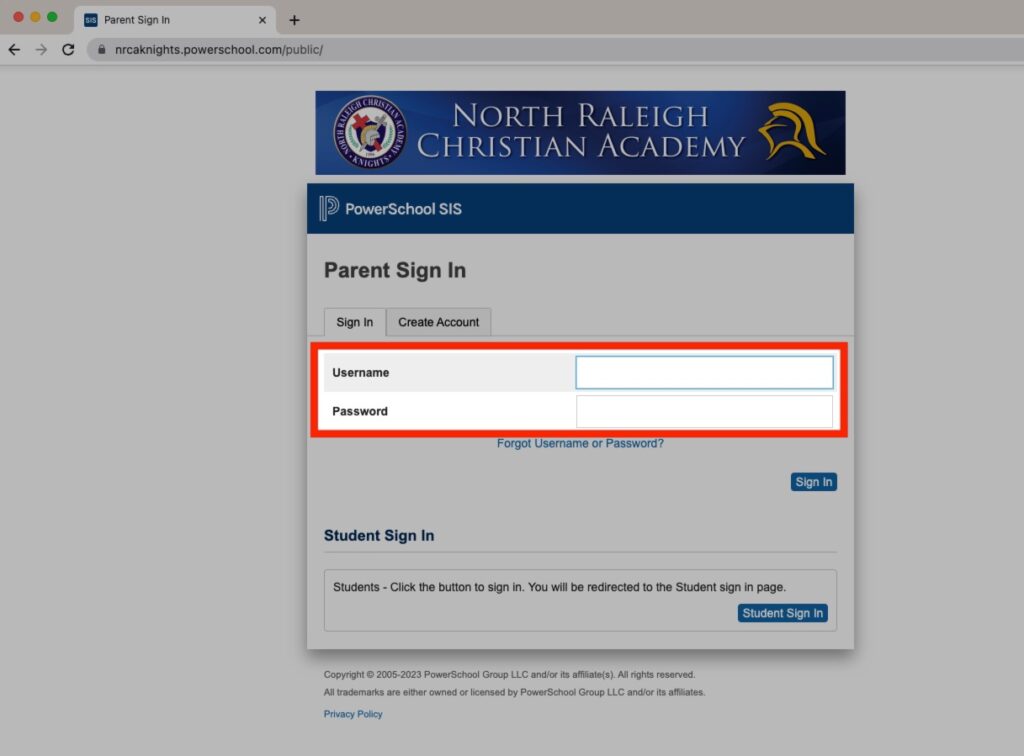
STEP 1 Navigate to NRCA's PowerSchool in a web browser
STEP 2 Login with your parent username and password
For instructions to create your parent PowerSchool account, please see the help article 'How do I create my parent PowerSchool account?'.
STEP 3 Click 'Schoology' on the left-hand navigation menu
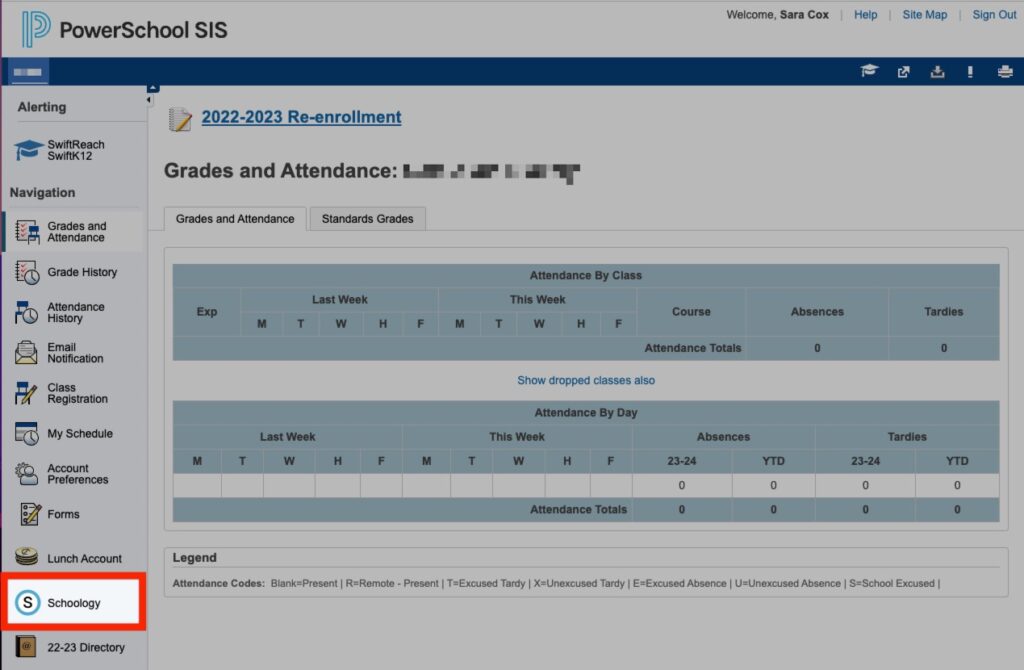
STEP 4 Locate the unique Schoology Access Code for each child
If you have more than one child, please click on each child's name and then Schoology on the left-hand navigation menu to find each individual access code.

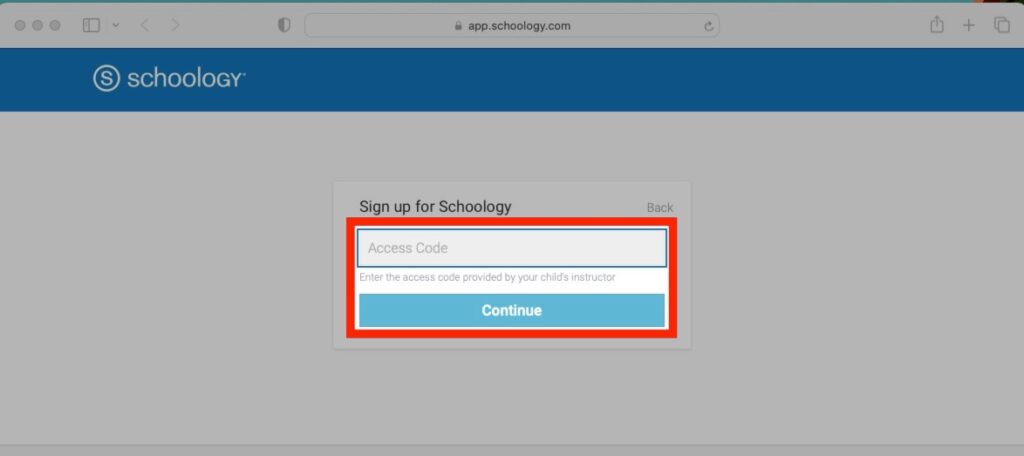
STEP 5 Navigate to Schoology
STEP 6 Enter the Access Code for your child and click 'Continue'
You will find this Access Code by following steps 1-4 above or in your Parental Accounts Letter that was emailed to you at the beginning of the school year.
If you have more than one child, choose one access code to begin.
When you use the Parent Access Code to create an account, you are automatically associating that child with your account.
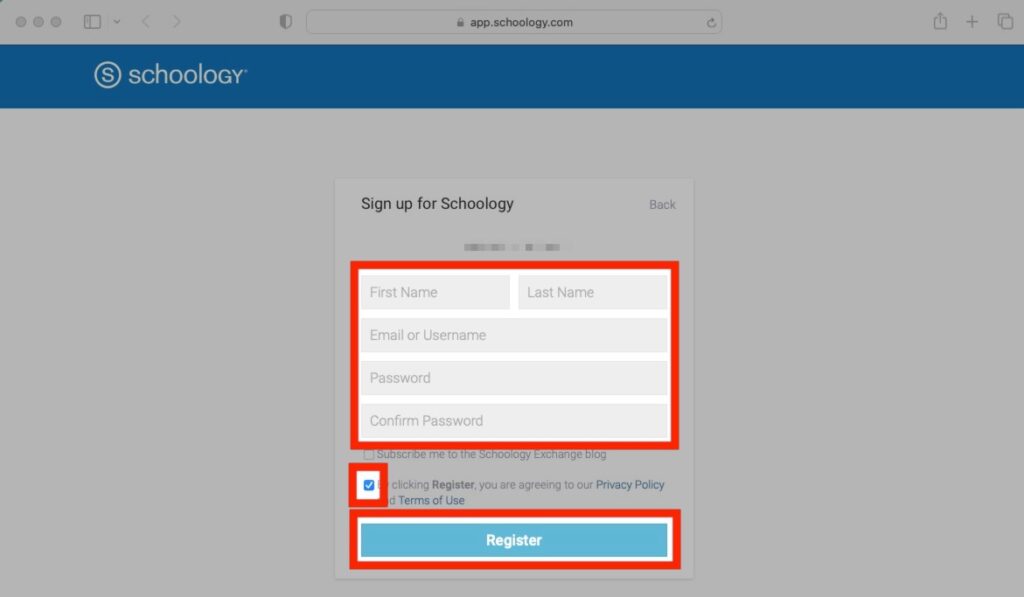
STEP 7 Complete the information below to register your Schoology account
Fill out your name, email and password, check the box next to 'By clicking Register, you are agreeing to our Privacy Policy and Terms of Use' and then click 'Register'
STEP 8 Login to Schoology
STEP 9 To add more children to your parent Schoology account, complete steps 10-12 below
If you only have one child, you have completed your parent Schoology account creation and do not need to proceed any further.
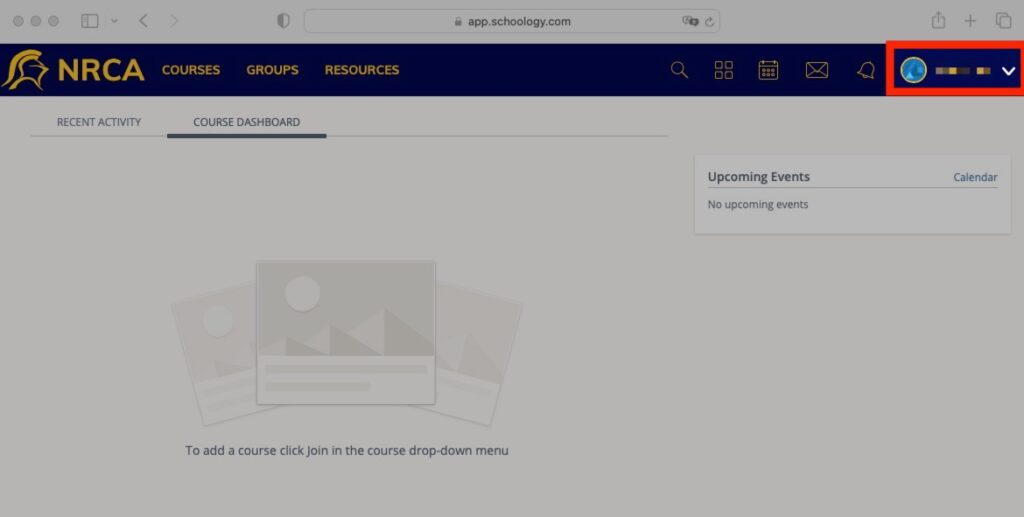
STEP 10 Click on your name in the top-right corner
STEP 11 Click 'Add Child'
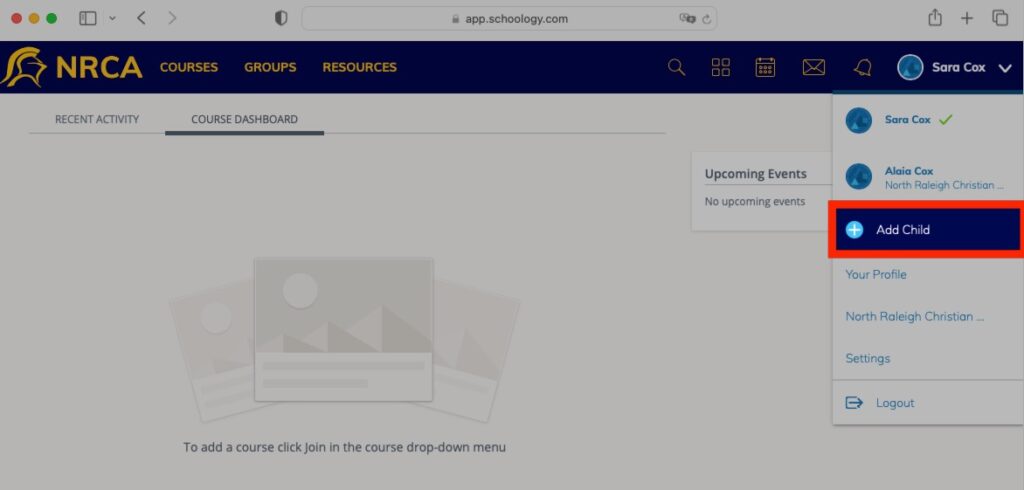
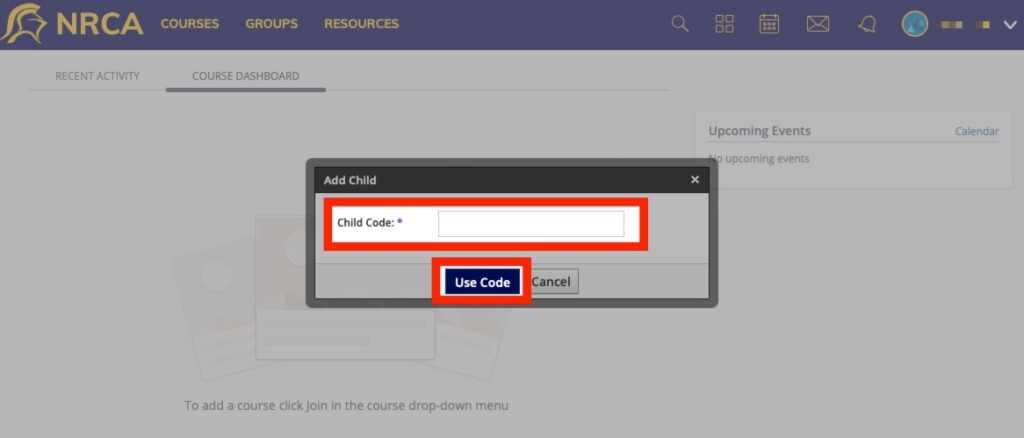
STEP 12 Add Child Code and click 'Use Code'
